Developing Weapons for Brickadia, Part 2
Now that our weapon is modeled and rigged, it's time to take you through animating it and implementing it into Unreal Engine!
This blog post is a continuation of our latest development post. If you haven't read it yet, you can check it out here! A lot of what it covers is still relevant to this post.
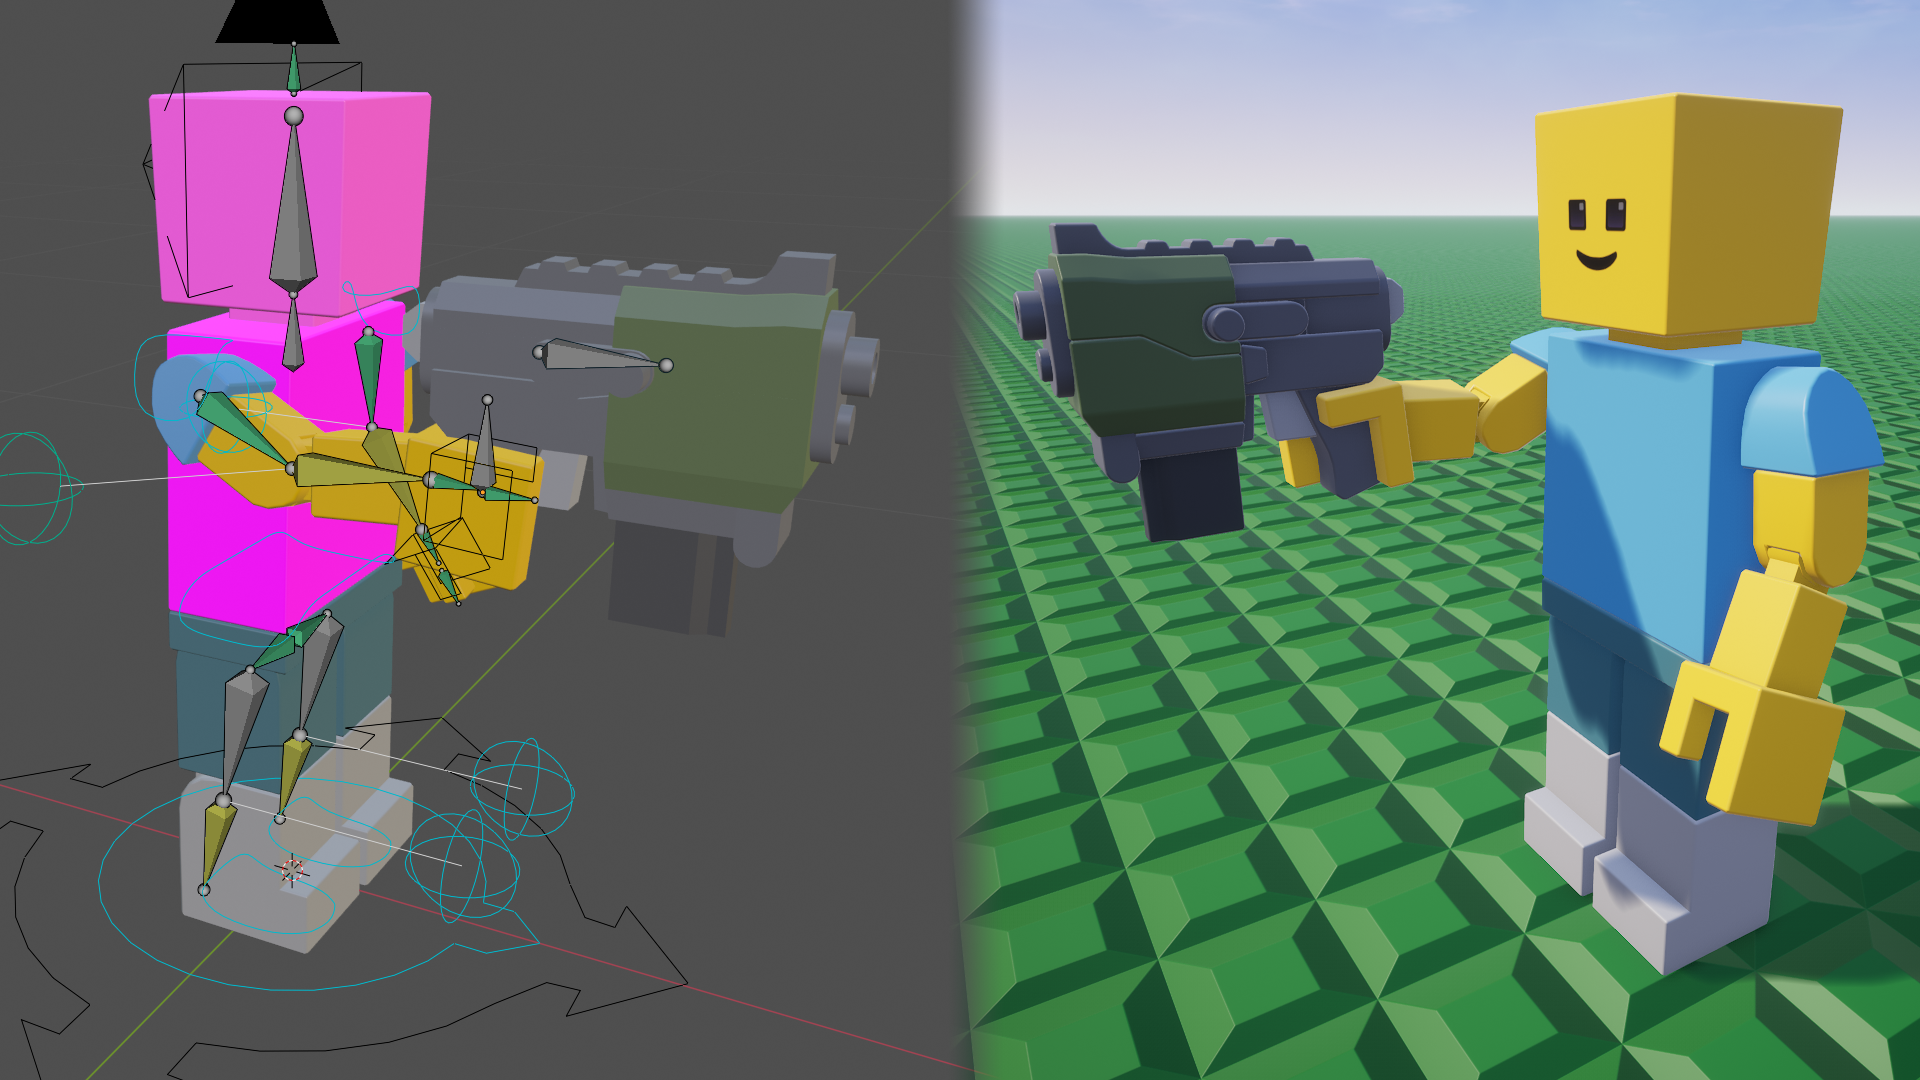
Now that we've got a completed and rigged weapon model, the next step is for us to animate it and implement it into the game. Just like when we initially created the model, the animation stage requires some preplanning as well. We're going to want to create a flowchart depicting how the weapon works, and then use that to determine how many different animations we need to create. Brickadia weapons use a system called a state machine to determine how the weapon functions in-game, which acts in pretty much the same way as our flowchart. When the weapon is equipped, it plays its equip animation and is set to an Idle state until the fire button is pressed, upon which it will switch to a fire state where the firing animation is played and a projectile is spawned. The weapon then switches back to its idle state. If we unequip the weapon, we need to play our unequip animation and then pause the state machine until the weapon is re-equipped.
Fortunately, the flowchart for this weapon is very simple. It does not need to take into account reload animations, which means we overall we only need to animate:
- An idle pose
- Poses for aiming up and down (called an Aim Offset)
- A firing animation
- An equip animation
- An unequip animation
Now that we know what we need to animate, we won't encounter any unexpected states that are missing animations. Now we can bring the weapon into our brickhead rig and begin to animate it.
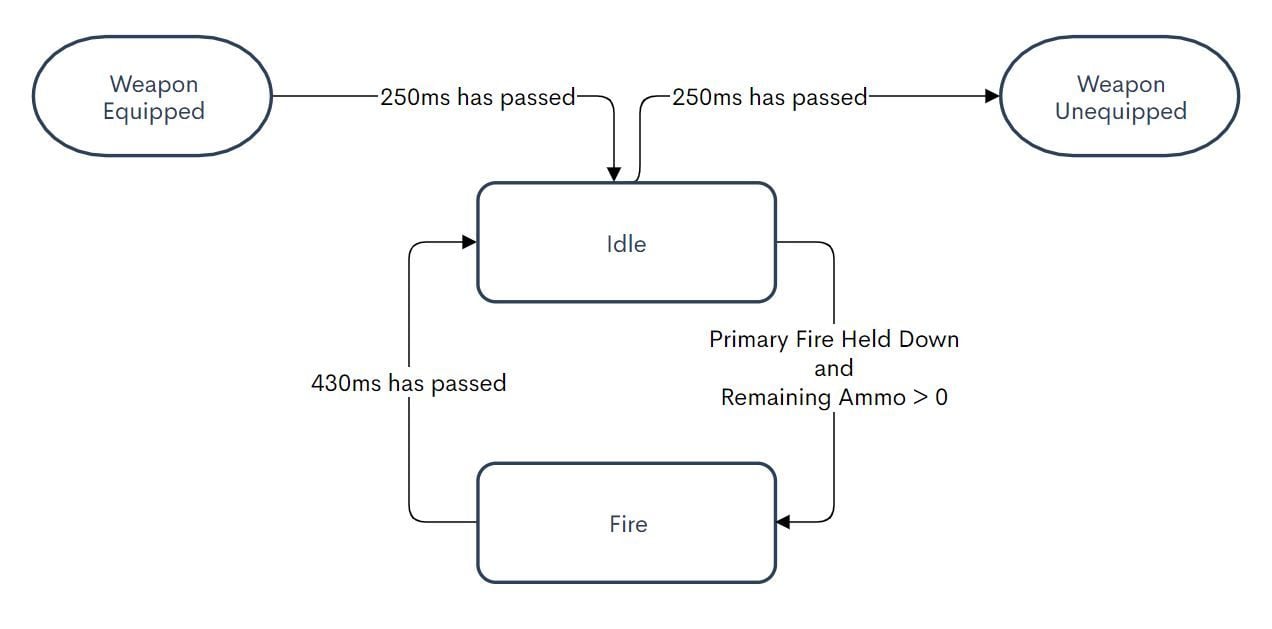
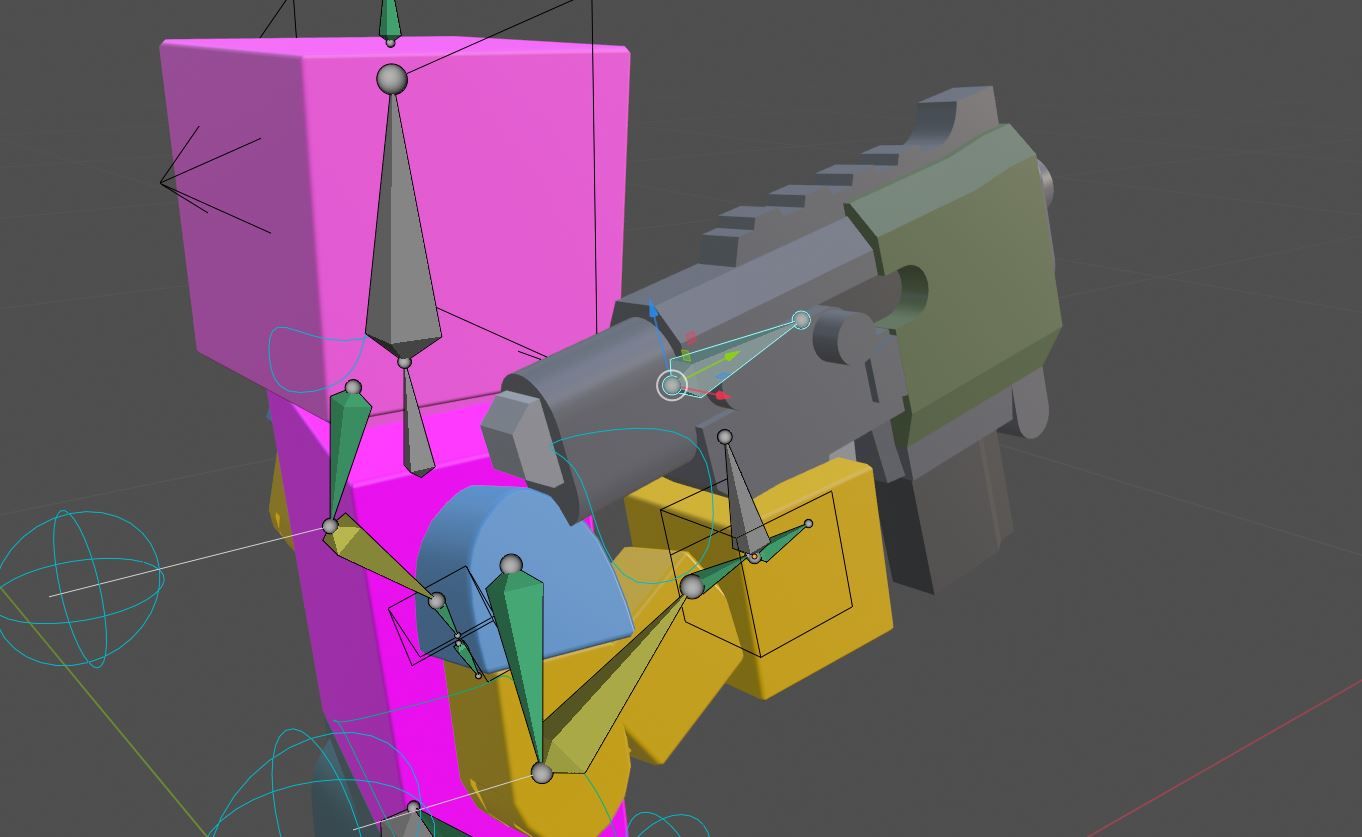
First, we append the weapon mesh and its armature from the file we worked on in the last blog post into the rig file. It's also a good idea to create a separate collection to keep anything weapon related separate from the rig. Now we can attach the pistol to our brickhead's hand using a Child Of constraint. Constraining the weapon to AWeapon_R will snap the weapon into the hand, and we can even pose the weapon within the hand by manipulating the weapon bone. Once the weapon is in the hand and aligned directly forwards, we can begin to create an idle pose.
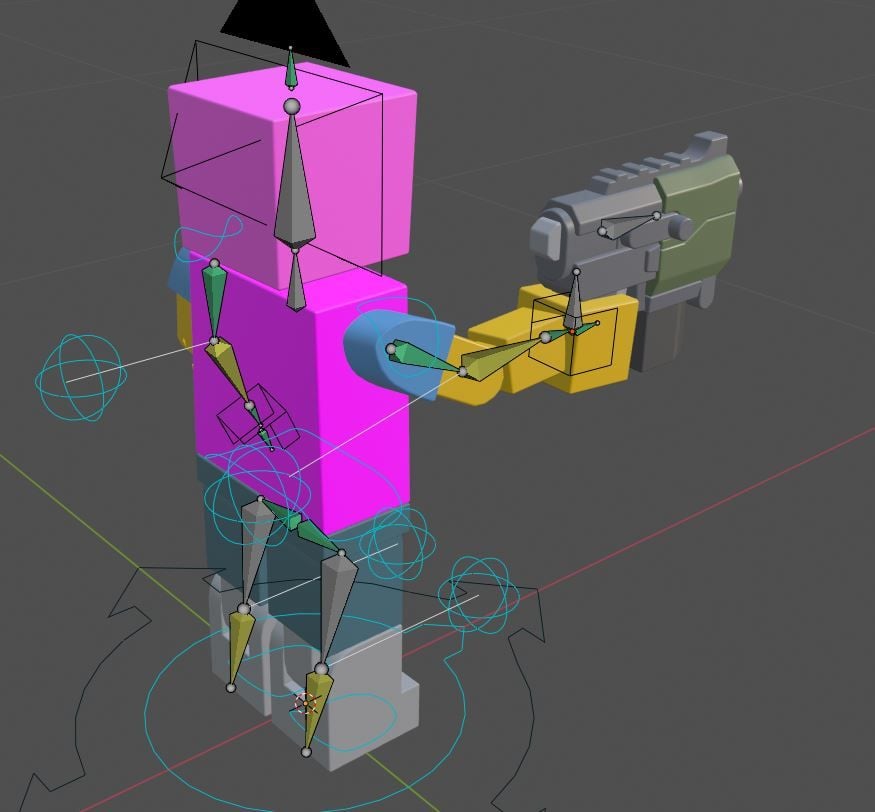
Fortunately, it is very easy to make idle poses for one-handed weapons, as the figure just needs to face straight forwards. However, due to the bulk of the weapon and the angle it is held in the hand, we can't simply reuse the existing pistol poses that are currently in game. Once we have a pose that looks good, we can create an action for it. All of our other animations will be based off of our starting pose, so it's important that there aren't any issues with it.
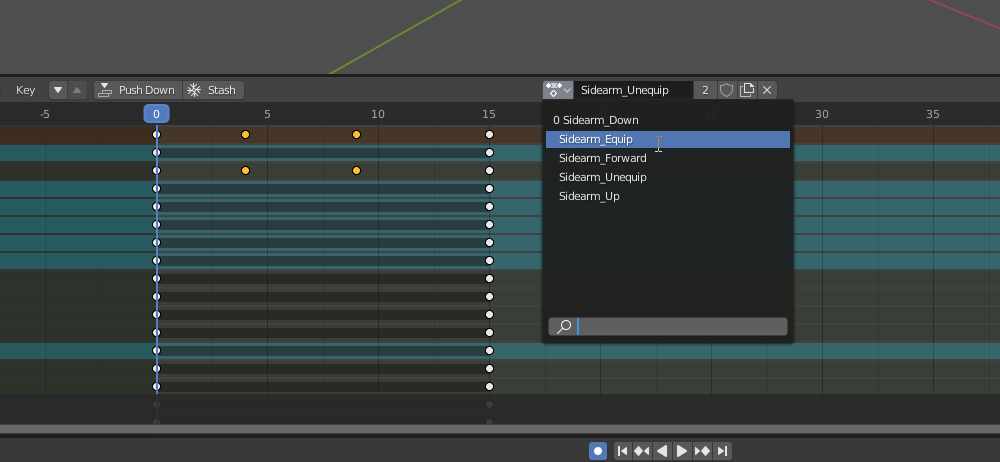
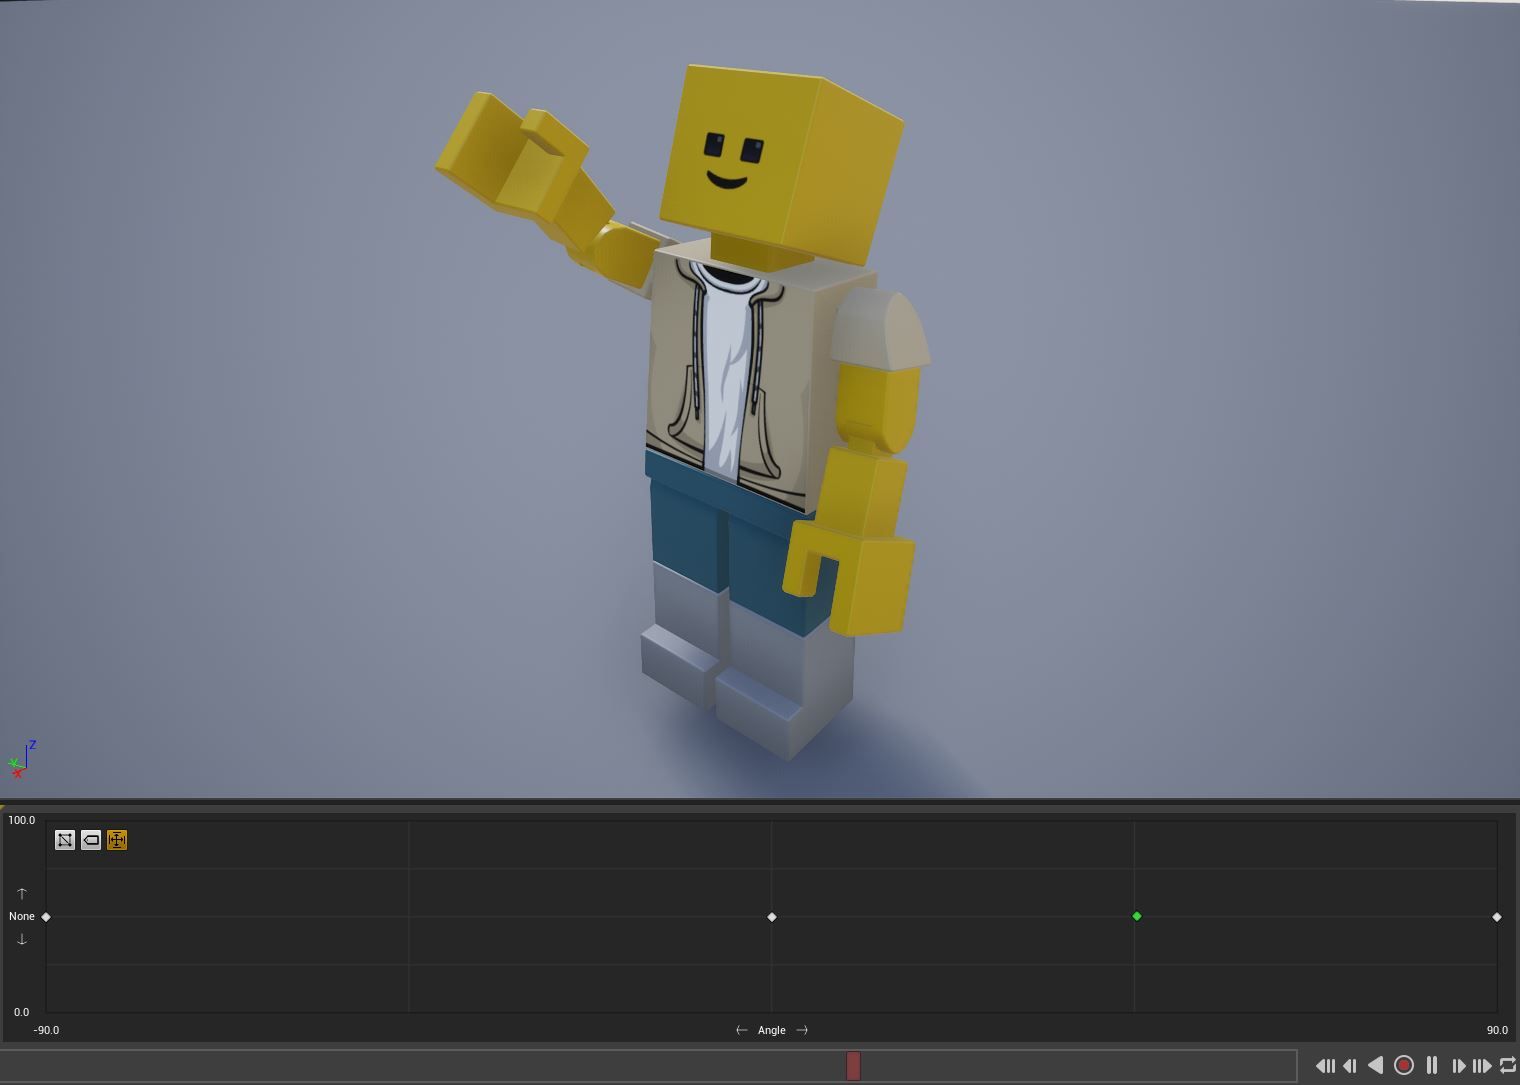
Actions allow you to break up a rig's animations which can then be exported separately into Unreal Engine. We're going to have separate actions for our different animations. I like to start by creating actions for our aim offset poses. We need one up pose and one down pose, which will be used for the brickhead aiming the weapon 90 degrees up or down respectively. These poses can be blended as the player aims their weapon in third person to smoothly change the angle the weapon is pointing at.
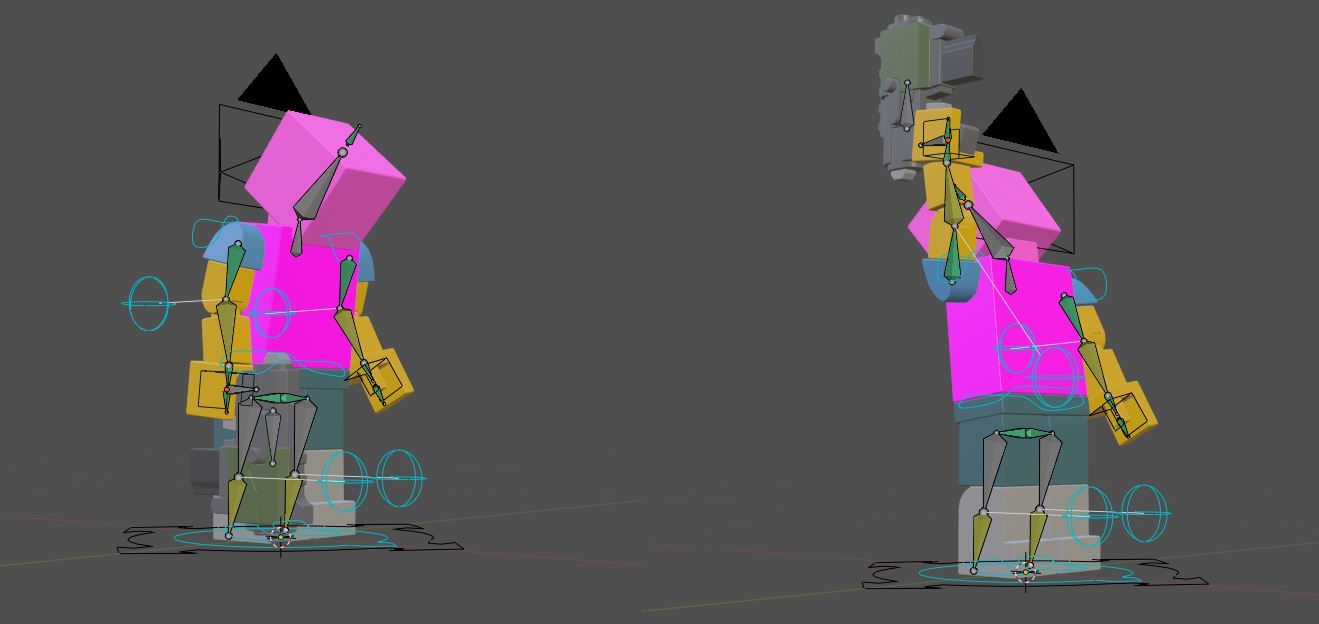
Next, we're going to create our equip and unequip animations. These should each be roughly .25 seconds long (15 frames if you're animating at 60 FPS as I tend to) so that equipping the weapon isn't too sluggish but also isn't an instant snap to our idle pose. For these animations I like to start with the beginning and end poses and then add keyframes in between to improve the flow and weight of the animation. For the equip animation, the beginning pose should be close to the standard idle pose of the brickhead without an item equipped, while the end pose should just be our Idle pose. This is reversed for the unequip animation.
With all of the other animations finished, we can move on to our firing animation. Firing animations are one of my favorites to animate, a close second to reload animations (which we won't need for this weapon). Unlike equip animations, I tend to create the firing animation by working from the beginning of the animation to the end, and simply blending it back into the idle pose once the animation is complete. When animating at 60 fps, I usually have the apex of the weapon's recoil about 3 or 4 frames into the animation, and then spend the rest of the animation moving the weapon back towards the idle pose. During this animation, we also keyframe the Bolt bone we set up in the last post to move backwards while firing. There's a lot more nuance to making the weapon feel like it actually has weight and power, but I won't be discussing the theory behind animation during this post.
Once all of our animations are complete, we're almost ready to import them into Unreal Engine. Before we do so, though, we need to add the actions to Blender's Nonlinear Animation stack. The NLA stack is handy for a lot of things, but specifically in our case we're just using it to tell the exporter plugin what animations to export. The actions for the weapon need to be added separately from the brickhead's actions, as we'll be exporting each one separately. This allows any bone keyframes on the weapon to be animated relative to the weapon's Handle bone, such as a magazine during a reload animation.
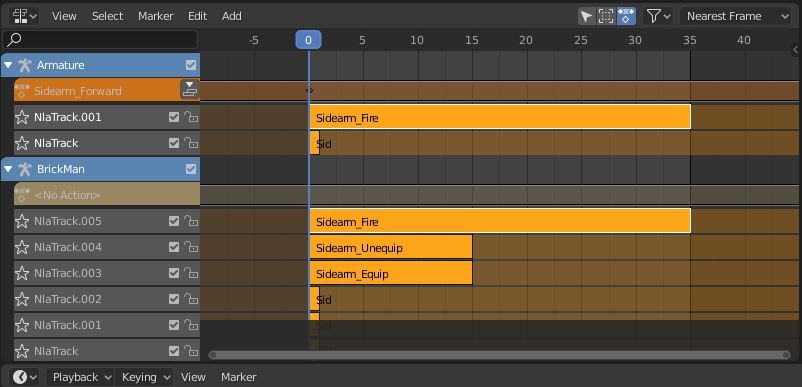
Now that everything is ready, we export the animations for the weapon and the animations for the brickhead each into their own file. Once that's done, we can hop into Unreal Engine and get ready to import everything we need.
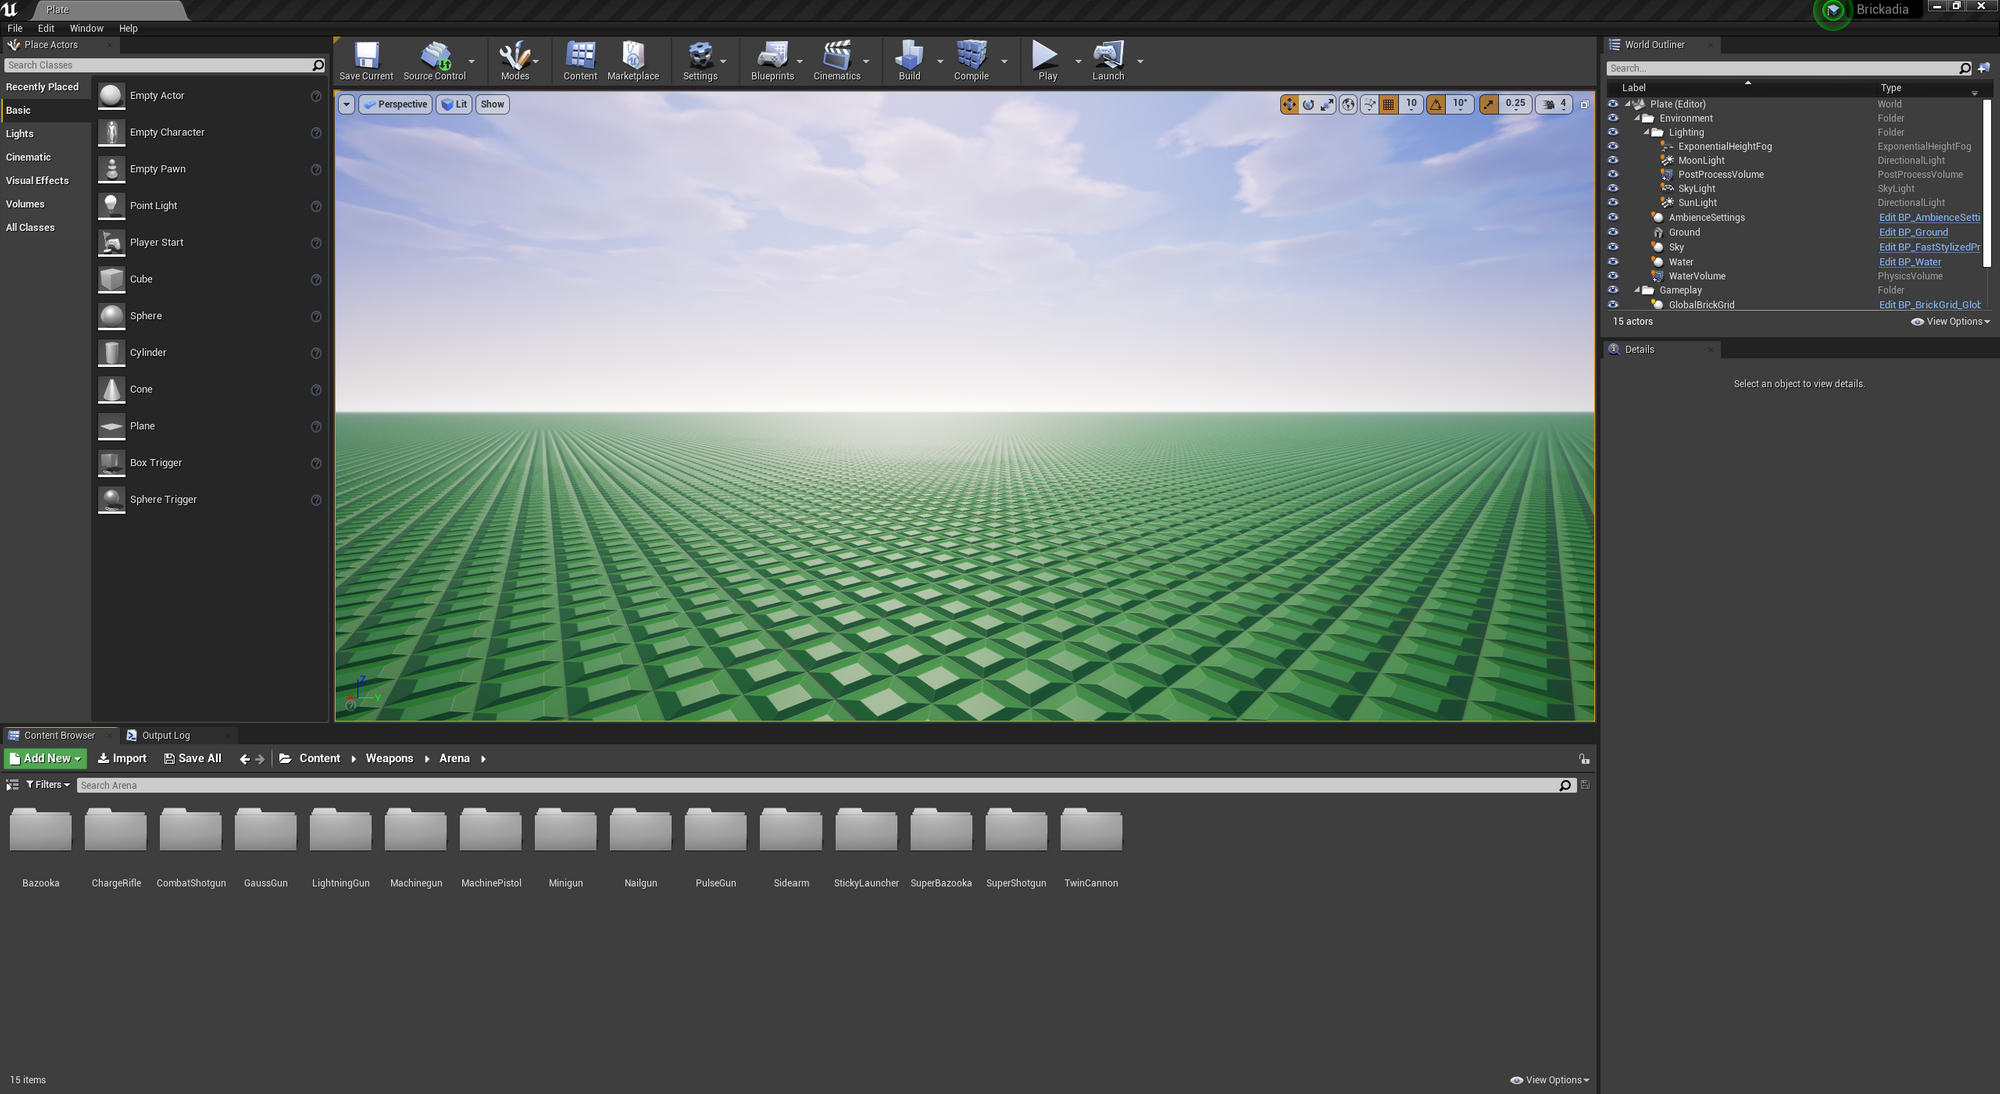
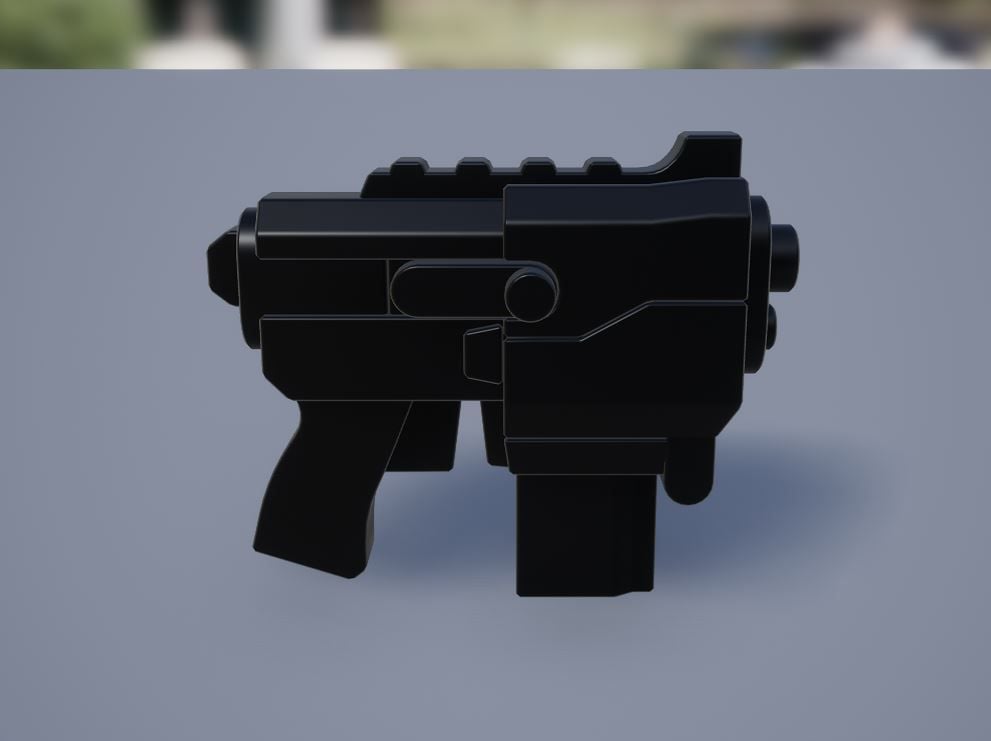
We'll start by importing the weapon model. This is a separate file from the animations, and we'll need it set up properly in order to import animations for it. When importing animations, you have the option to select an existing skeletal mesh or create a new one from the imported file. As our animation files only contain animation data and no model data, we need to import the weapon first separately. Once it's imported, we need to set the material to Plastic_Primdata. This is a special plastic material that takes the color data that was exported with the file, and uses it to correctly color the weapon. We have a few things to do before we actually set up the colors, though.
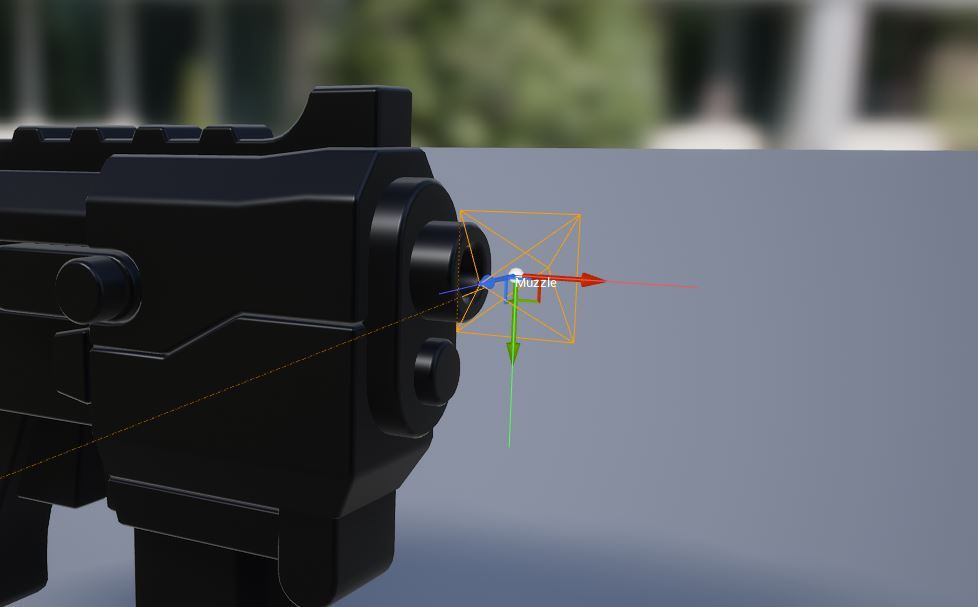
We can also go ahead and add a socket named Muzzle to the weapon skeleton, and position it at the muzzle of the gun. This is where projectiles will be spawned from, as well as our muzzle flash particle effect.
Now we need two more things for a functional weapon: a weapon blueprint and a state machine blueprint. the weapon blueprint is the actual object that the player holds in their hands, while the state machine tells that weapon what to do. We'll create the weapon blueprint first.
Inside the weapon blueprint we can set the name of the weapon, the magazine size, what state machine it uses, and a whole host of other things. First, we set it to use the skeletal mesh we just imported. Next, we grab the color data from a script where it was saved automatically in the Blender file, and paste it into the mesh colors array.
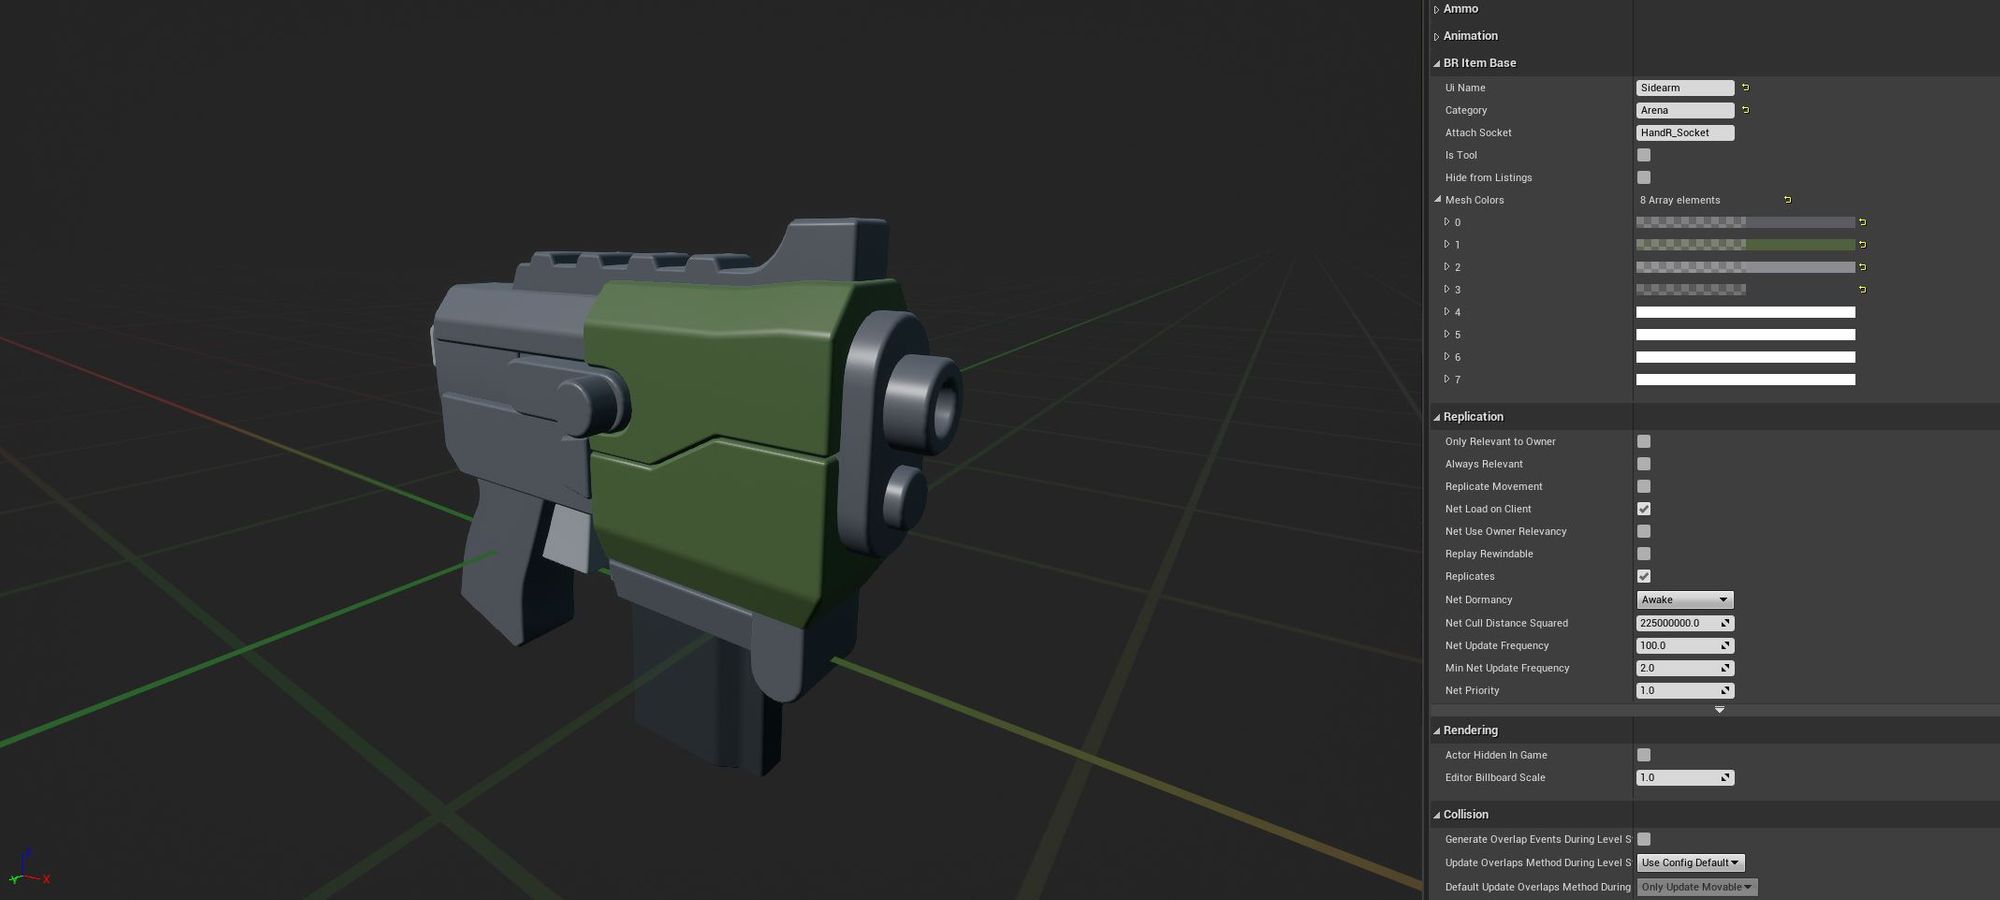
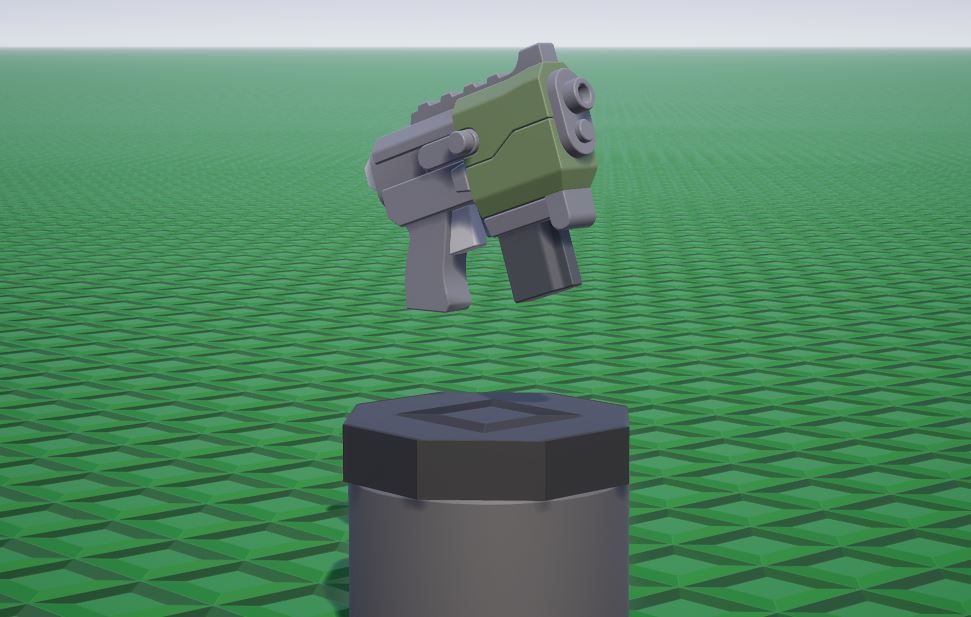
Now our weapon is properly colored! We can also set our weapon to have an infinite magazine for the time being (which will be the case until we have an ammo resource system in place to allow for ammo pickups etc) If we were to play the game and equip it, our player would hold it in their hand. However, it would look a bit odd as it doesn't have its custom animations yet, not to mention the fact that it doesn't do anything at all because we haven't set up its state machine. (A state machine with no states set up actually can cause the editor to crash!) We'll go about setting up the state machine next.
When we open the state machine, we immediately want to set the equip duration to the same duration that our equip and unequip animations play for. Next, we need to create our weapon states. We'll only need two for this weapon; a main state (which will act as our idle state) and a fire state. the equip and unequip parts of our flowchart are handled by the global item state machine, so we don't need to worry about that besides specifying equip and unequip animations once we import them.
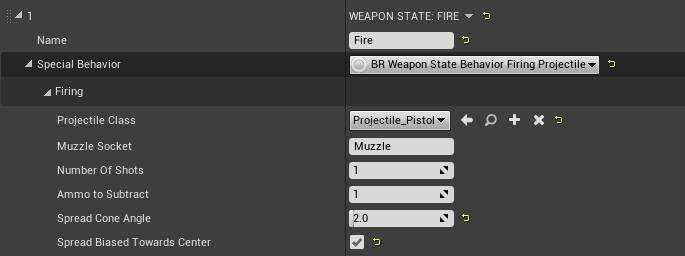
We now want to specify that our fire state needs to cause the weapon to fire a projectile. Using the state's behavior dropdown we can choose the projectile we want to fire, how many of them should fire at once (for shotguns and other multi-projectile weapons) and the spread cone for the projectile. For now, we will just have our weapon fire the same basic bullets as the pistol that is currently in the game. We can leave the "ammo to subtract" field at the default of 1.
Now we have our firing state, but we don't have any way to actually transition between states. We're now going to set up a transition from our main state to our fire state that allows the weapon to fire so long as the primary fire input is pressed and the weapon has at least one bullet left in reserve. We then set up a transition from the fire state to the main state after a short period. As soon as the weapon re-enters the main state, it will immediately detect that it should switch back to the fire state, allowing the weapon to fire automatically while the fire button is held down. If you wanted to create a weapon that fired in semi auto, you could specify that the fire button has to be released before the weapon can transition out of the Fire state.
Now our weapon might seem like it should be functional. However, we are missing one last step; the weapon doesn't actually have any way to detect input from the player. We simply need to put together this short blueprint to have it detect the fire button, which for now is the only button the weapon uses.

If we were to add a secondary fire or any other actions, we'd need to repeat this for each input. Now when we play the game, our weapon fires projectiles when we hold down the mouse!
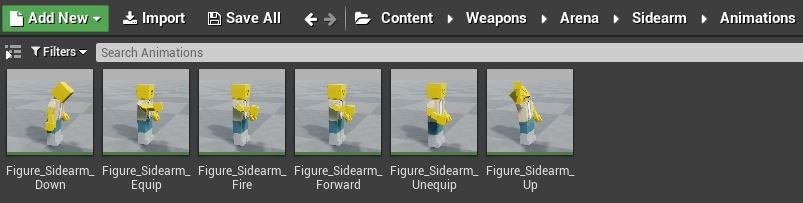
While our weapon is functional, it is far from finished. It's time to make use of those animations we created! We will start by importing the brickhead's animations. Simply select the file containing the animations and specify Figure as the skeleton to use. Now all of our animations are imported, but we have a lot of work to do before they can be used.
We're going to set up the aim offset first. First, we create a new aim offset asset based on the figure skeleton. Then we take our up, down and forward-pointing poses and set them to have mesh space additive animation. This allows the aim offset to smoothly blend between them. We then add the poses to our aim offset, and set them up so that up is at 90 degrees, down is at -90 degrees, and forward is at 0 degrees. This means, for example, that when our weapon is aimed up at 45 degrees the pose will be halfway between our up and forward poses. Once this is done, we can specify the aim offset to use within our weapon blueprint, and now our character aims the weapon with our custom poses!
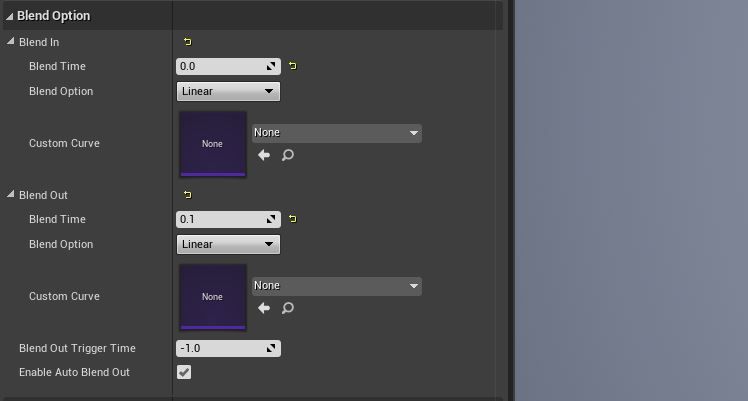
Next, we need to create animation montages for our equip, unequip and fire animations. Montages are needed to allow animations to blend between each other properly. So that it aims up and down properly while firing, we need to set our fire animation to have the same additive animation as the aim poses, but using the forward pose as a reference. Otherwise, the weapon would snap back down to a 0 degree angle when firing. Now we need to set our equip animation montage to blend out as it finishes equipping the weapon. The reverse is true for the unequip animation, where we want it to blend in as we begin to unequip the weapon. Then we can set our firing animation to have no blend in, and a bit of blending out at the end to smoothly transition back to the idle animation.
One last thing we need to do is specify the slot each animation uses. This tells the animation what bones it is allowed to have an effect on. We will specify WeaponUpperBody for our firing animation (so that it has no effect on the legs) and WeaponEquip for our equip and unequip animations.
Now our figure animations are ready to be added to the State Machine. Adding the animations to the state machine is as simple as selecting the correct animations for our equip, unequip, and firing animation slots. We can also add placeholder firing and equip sounds to use until Arekan creates new sounds for our weapon.

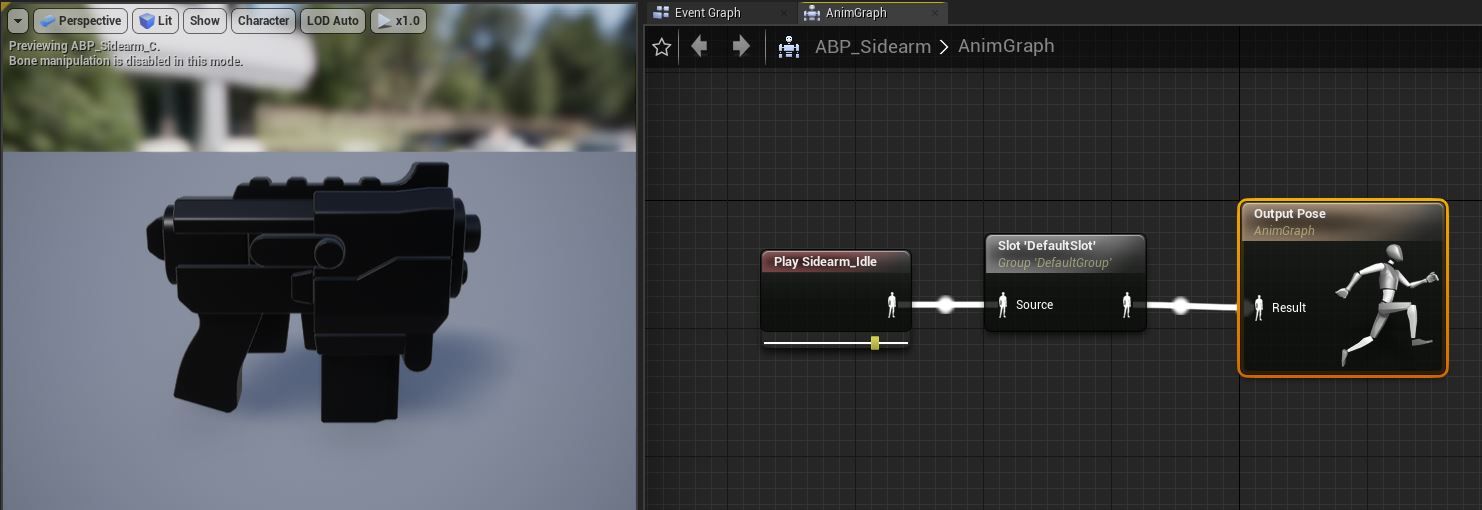
We have our figure animations working now, but the weapon itself is still very static and boring. Like our figure animations, our weapon animations will require some setup before we can use them. First, we'll import our animations and specify our weapon's skeleton as the one we want to use. Our weapon will now need a custom animation blueprint. While animations blueprints can be extremely complex, all ours needs to do is tell our weapon to play its idle animation through its default slot. This is what our weapon will do when it is not otherwise playing an animation. Like our aim offset, we need to specify that our weapon mesh will use this animation blueprint via our weapon blueprint. Now all we need to do is create an animation montage for our weapon's firing animation.
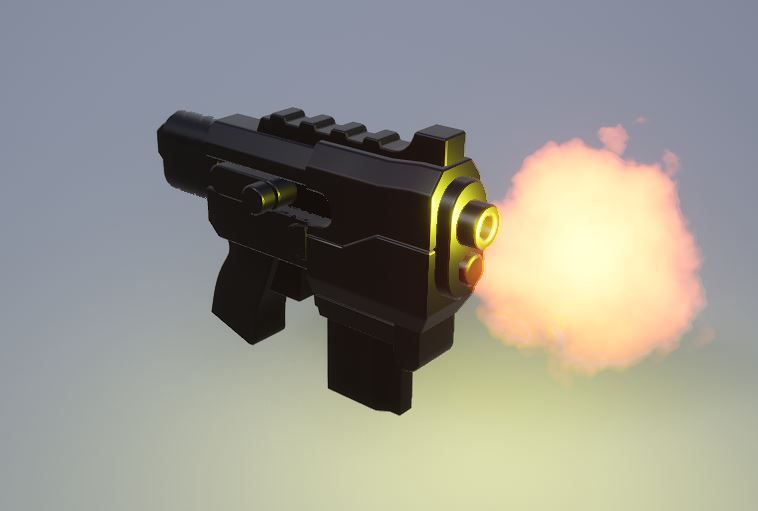
As this animation starts and ends on the same pose, we don't need any blending for this montage. This montage is also where we will add our weapon's muzzle flash particle effect. Simply add an animation notify (which tells the weapon to perform an action at a timestamp in its animation) and have it play the MuzzleFire particle effect attached to the muzzle as soon as the animation begins to play. We can also add a shell eject particle so that our weapon launches an empty casing away when it fires.
Our weapon is now animated and implemented! There is still a lot of important polish it will need in the future, such as a custom projectile and sounds, as well as more a more advanced state machine with a secondary fire option. However, these can easily be implemented later on in development. For now, here's a demonstration of how our weapon works in game, as well as a weapon with a more complex state machine shown off at the end:
I'm glad you stayed with me through such a long and technical series of blogs. I hope these last two posts have given you some insight into the process of creating Brickadia's weapons, and I also hope it inspires you to come up with weapon ideas of your own once modding is supported! In the meantime, if you have any questions or ideas, feel free to find us on Discord, Twitter, or e-mail.